Folks, a lot has happened. Last year was a blur. I really haven't given you guys a glimpse of our store front we opened in Downtown Farmersville. This post will be the first in a series about our business startup. It's been wild. Thank you for helping make it such a success.
I will start off with some pictures of the windows filled with merchandise. You can see in some of the photos that the window trim and doors have now been painted. That was a relatively inexpensive upgrade we did to help out the front of the store.


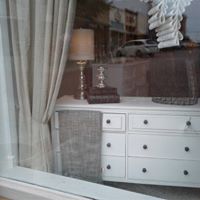


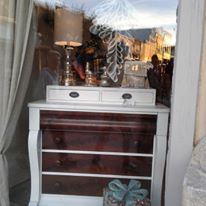
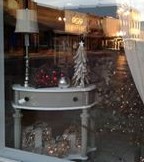

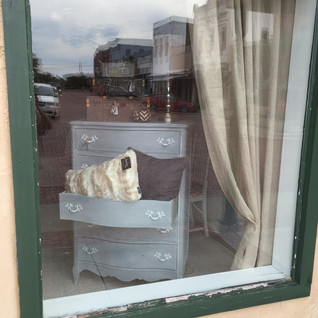
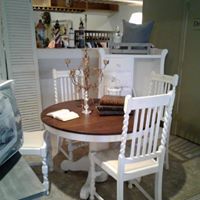
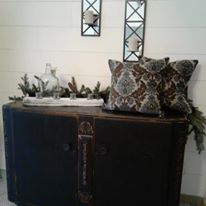
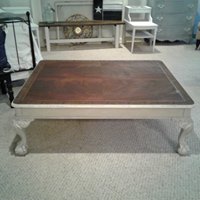
Our store is all about neutrals. Here are a few shots of our furnishings. We are always bringing in new merchandise.


I will post new pictures of how the store is arranged now. Many of these things have sold and I have brought in more new merchandise and rearranged. Hopefully, you can see why I haven't had time to post over these last few months. :)

Update: The last few months have been tough. I have been plagued with health issues that shut down any work for almost a whole month. But, my "Construction Fairy", (aka Kevin Long - Husband and worker extraordinaire), has kept things afloat.
We are opening a small store in downtown Farmersville, TX. It will located in the Shops at Sugar Hill. The Tea Room is also reopening. Works is well under way to inexpensively transform the front of the shop into a French Farmhouse wonderland.
Wide-plank shiplap was installed on one of the 16'H walls. It looks gorgeous. Furniture is beginning to trickle in as we continue to paint and spruce up the place.
Today I am posting a picture of one of the dining chairs that belongs to a set we are selling at the store. I chalk painted it in a dark gray and distressed it with a white wax. The seats were stripped and recovered in a heavy Duck Cloth in Natural. Even though the pieces are actually a Chippendale style, they would look more comfortable now in an upscale French Farmhouse.
You can see the detail in the close-up photo. Here's a peek...

Save

The bathroom is coming along fabulously. The only thing that is frustrating me is the amount of time I must spend doing other things and not focusing on this project through to completion. The cabinets still need to have moulding and trim added, finish caulking, final paint and drawer pulls. The cabinet over the toilet will be sanded and refinished after we complete the vanity area.
The wall over the garden tub was needing to be completely reworked. I decided not to rehang the pictures there previously. They were too modern and the color was harsh with the softer, lighter shades. The paint colors used were Valspar Fog (wall), Valspar Du Jour (cabinets and trim). I scoured the craigslist ads for architectural items that were either free or cheap. Nothing seemed to work. Then I remembered the wood stashes in the garage and yard. Perhaps I should just make what I am looking for and be done with it. I decided for a long shelf on the wall, but was unsure of how to stage it.

Several months ago, I stumbled across a Craiglist ad for free antique barn wood from a city just 10 miles away! We got there and loaded up the cast-offs. Included were some thick, solid oak boards that appeared to have been used as flooring or stair moulding in their previous life. Whatever they were, I loved the chunky wood. (Plus it was free!). All I needed were some large corbels or shelf brackets. In the essence of time and effort, I decided to purchase them. I settled on a simple shelf bracket that cost just $10 each. Once home, I used a dark brown was on the brackets. I did a sloppy job coating them to give a distressed look that was more believable. They were then painted with a leftover white paint from another project. It wasn't labeled, so I do not know what color it is for sure, but it appears to be the leftover Du Jour from when we put up shiplap in the living room or stairway. The wood boards had a dark stain on them with a polyurethane finish. Since I planned to distress the wood, I just painted straight over the stain without sanding. When I had finished applying two coats to the brackets and boards in a VERY sloppy style, I let it dry for about an hour. After the paint was dry, I then used 80 grit sandpaper and pressed hard in long strokes to distress the wood. Beautiful! I nailed the back and brackets to the three boards which make up the shelf. Voila! Wall decor in just a few hours. the shelf was so heavy, my husband hung it using special toggle anchors. What I didn't mention in this story was that when I was looking for brackets or corbels I stopped at the downtown Caddo junk/stores. None there, but...I found a chippy old cross made from what appears to be old cabinet drawers ($4) and in the same booth, an old frame from an antique window ($7). The cross was wrapped with a necklace I made from items I purchased at Michael's and Hobby Lobby. I framed the cross with the old skeleton of a window. I plan to rework the way items are displayed by adding a few antique books and perhaps some tall candlesticks and other ephemera.


When I browse the shops in downtown McKinney, TX, there are a few favorites that have inspired my bathroom look. Chase Hall, Gray Living, Patina Green and Homepieces. Though they are each different, I love something about every of them and tried to incorporate a bit of each in my bathroom.
Still a number of finishing touches left. I will update the blog again once I have something new to show you with this project.
In the mean time, my garden is loving this mild, wet weather... I harvested and prepared one head of my cabbage. Delicious. Lettuce is going crazy as is everything else. I will have to snap a few photos once the rain stops. We also have 9 baby chicks! Things are exciting around here. Much to do...


